
How to Prepare a Low-Resolution Photo for Large-Format Banner Printing
You've got the perfect shot: great composition, the right mood, exactly what the client asked for. There's just one problem: the file is 1200×800 pixels and the printer needs at least 3000×2000 at 150 DPI. For a 3×2 meter outdoor banner, that's not even close.
This is one of the most common headaches in commercial photography and design. The good news: modern AI upscaling solves this in minutes - and "just blow it up in Photoshop" is no longer the answer.
Why Print Resolution Is Different from Screen Resolution
On a screen, 72–96 PPI looks perfectly sharp. Print is a different game entirely.
- Indoor banners and exhibition stands → 150–300 DPI at final output size
- Outdoor advertising and billboards → 30–72 DPI, but the physical scale is enormous
Even with the more forgiving outdoor DPI requirements, the total pixel count is still massive:
| Format | Physical Size | Min Resolution |
|---|---|---|
| Roll-up banner | 85×200 cm | 150 DPI → ~5000×11800 px |
| Outdoor banner | 3×1 m | 50 DPI → ~5900×1970 px |
| Billboard | 6×3 m | 30 DPI → ~7100×3540 px |
Rule of thumb: multiply your output width in centimeters by the required DPI ÷ 2.54. That's your minimum pixel width.
What Happens When You Just Scale Up in Photoshop
The classic approach - dragging the canvas size in Photoshop, adding Unsharp Mask - doesn't cut it. Here's why:
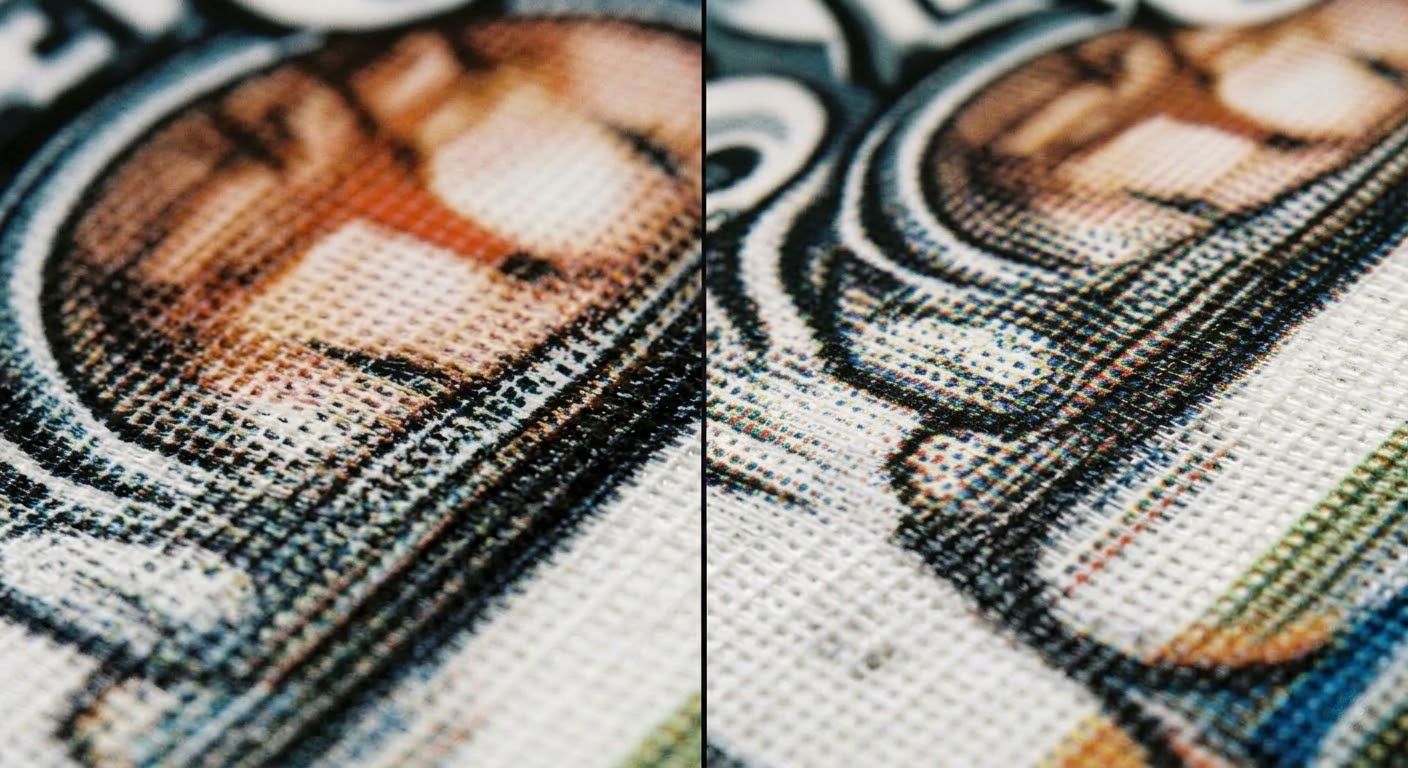
Standard bicubic interpolation adds pixels by averaging neighboring values. The result:
- Edges go soft
- Textures smear
- Fine detail like hair, fabric weave, or text becomes a blurry mess
- At banner scale, every artifact is visible from 5+ meters away
For years, the only workarounds were to reshoot at higher resolution, composite multiple frames, or talk the client into accepting lower quality. None of those are fun conversations.
AI Upscaling: Why It Actually Works
Modern AI-based upscaling doesn't guess - it reconstructs. Neural networks trained on millions of images can generate plausible detail that simply wasn't in the original file.
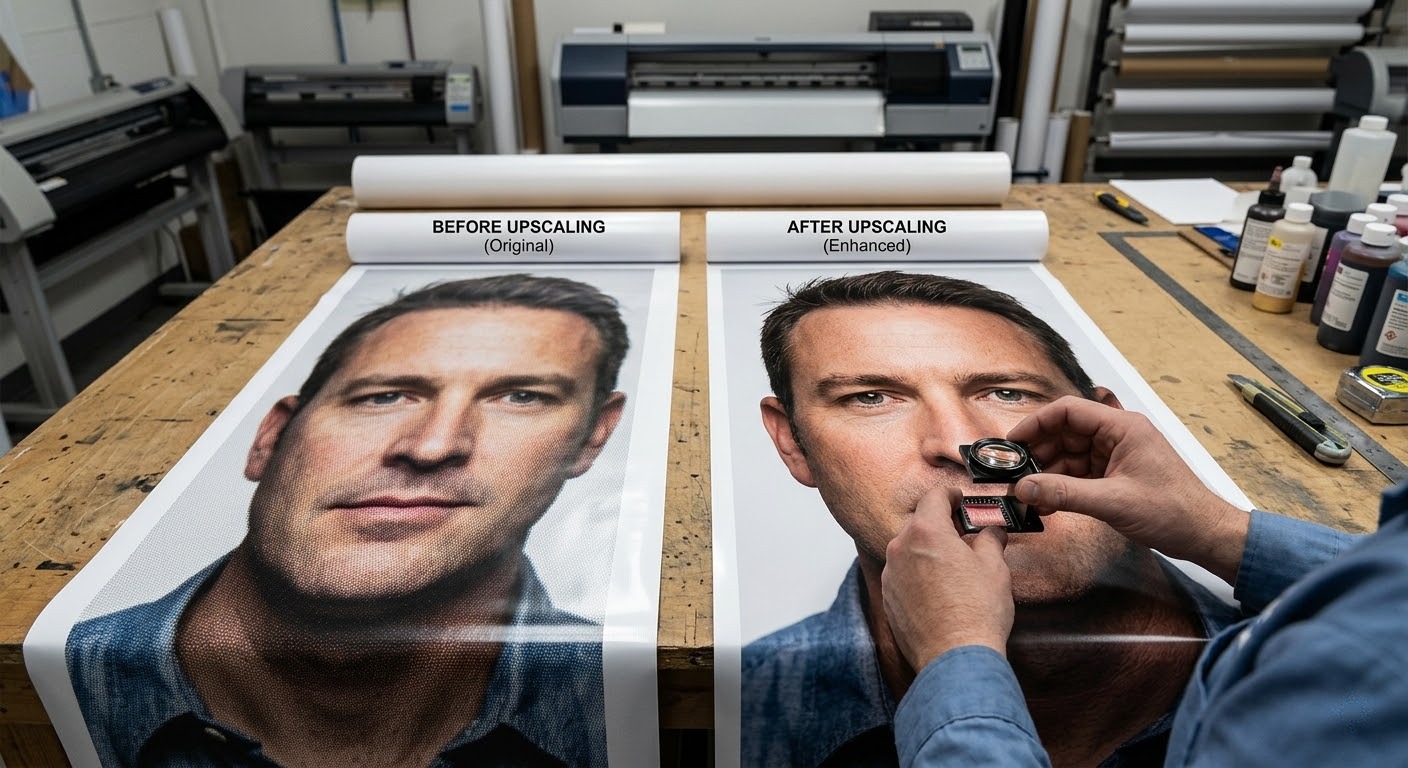
The difference is visible immediately:
| Area | Traditional scaling | AI upscaling |
|---|---|---|
| Hair & fur | Blurry clumps | Individual strands |
| Fabric texture | Smeared pattern | Convincing weave |
| Faces | Lost pores and lashes | Faithfully rendered |
| Architecture | Soft edges | Crisp, clean lines |
Tools like PixelFlair apply this in seconds - no plugins, no batch scripts, no Photoshop actions.
Step-by-Step Workflow: From Low-Res Photo to Print-Ready Banner
Step 1. Assess Your Source File
Before doing anything:
- Check actual pixel dimensions (not file size in MB)
- Evaluate sharpness at 100% - a soft original gives a soft result, even after AI
- Look for JPEG compression artifacts - blocking and ringing get amplified at scale
If the file is heavily compressed, run a light denoise pass first. A noisy RAW conversion upscales better than a processed JPEG that's been resaved five times.
Step 2. Upscale with AI
For most banner work, 2× to 4× is the practical range:
- A 2000×1500 px image upscaled 4× → 8000×6000 px
- That's enough for a 2×1.5m outdoor banner at 100 DPI ✓
For very low-res sources, two 2× passes often produces sharper results than a single 4× upscale.
Step 3. Export for Print
Once you have your upscaled file:
- Format - TIFF (lossless) for the final handoff; JPEG quality 95+ if your printer accepts it
- Color space - convert to CMYK only if the printer explicitly requires it; most outdoor digital printers work in RGB
- Profile - embed sRGB for outdoor printing
- DPI metadata - verify it matches the printer's spec before sending
- Bleed - add 5–10mm on all sides; do this before upscaling if possible
Step 4. Soft Proof Before Sending
- Load the printer's ICC profile in Photoshop or Affinity Photo
- Watch for hue shifts in saturated reds and cyans - these are the most common surprises
- Check shadow detail - outdoor printing tends to crush dark areas more than your monitor suggests
- Evaluate at 50% zoom - the industry standard for simulating print viewing distance
Common Mistakes to Avoid
Upscaling an already-compressed JPEG. Every resave cycle adds artifacts. Always start from the original RAW or the highest-quality version available.
Going straight to 8× in one pass. Extreme single-pass upscaling introduces instability in fine textures. Upscale in stages for anything above 4×.
Forgetting bleed. Printers trim. Without bleed, you risk white edges on the finished banner.
Trusting your monitor calibration blindly. Even a well-calibrated display won't match a large-format inkjet output. Soft proofing with the actual printer profile is the only reliable check.
What Resolution Do You Actually Need?
Here's the honest answer: for outdoor advertising viewed from 3+ meters, 50–72 DPI at final print size is usually sufficient. The human eye can't resolve fine detail at that distance anyway.
| Viewing distance | Practical DPI |
|---|---|
| 1–2 m (roll-up) | 150 DPI |
| 3–5 m (street banner) | 72–100 DPI |
| 5–10 m (building wrap) | 50–72 DPI |
| 10 m+ (billboard) | 25–50 DPI |
A 6-meter billboard only needs about 14,000 pixels across at 60 DPI. A 2×1m street banner at 72 DPI needs ~5600×2800 px. Starting from a 1400×700 source? A 4× upscale on PixelFlair gets you there.
The Bottom Line
AI upscaling isn't a rescue tool for bad photos. It's a standard part of the professional print workflow for extracting maximum usable resolution from any source - whether that's a smartphone shot, a scanned print, or a client-supplied image from a decade ago.
The workflow is simple:
- Start from the best source available
- Upscale with AI - PixelFlair handles 2× to 4× in seconds
- Export correctly for your printer's spec
- Soft proof before you send
That's it. No excuses to tell a client their photo can't go on a banner.

Illia Khomenko
Author